1. iOSエンジニアがFlutter を触ってみた
tamappe Tamappe Life Log

本当はボタンに1回転のアニメーションを入れたかったのですが、Animation の回転が思わぬ位置に止まったので諦めました。
なので前回紹介したフリップのアニメーションを使ってボタンにアニメーションをかけます。
前回の続きはこちらになります。
使うアニメーションのパッケージはこちらです。
NumberButtonのウィジェットクラスを改造します。
改造前
class NumberButton extends StatelessWidget {
  final int number;
  final Function onPressed;

  NumberButton(this.number, this.onPressed);

  @override
  Widget build(BuildContext context) {
    return Container(
      width: 60,
      height: 60,
      decoration: BoxDecoration(
        border: Border.all(color: Colors.white, width: 2.0),
        borderRadius: BorderRadius.circular(10),
        color: Constants.orangeColor,
      ),
      child: FlatButton(
          child: Text(
            '$number',
            style: TextStyle(
              fontSize: 20.0,
              fontWeight: FontWeight.bold,
            ),
          ),
          onPressed: onPressed),
    );
  }
}
改造後
class NumberButton extends StatelessWidget {
  /// ボタンの番号
  final int _number;
  /// タップした時の処理
  final Function _onPressed;
  final bool _isOnTouch;

  NumberButton(this._number, this._onPressed, this._isOnTouch);

  @override
  Widget build(BuildContext context) {
    return FlipCard(
      direction: FlipDirection.HORIZONTAL,
      speed: 500,
      // タップイベント
      onFlip: _onPressed,
      flipOnTouch: _isOnTouch,
      front: _frontNumberButton(),
      back: _backNumberButton(),
    );
  }

  Widget _frontNumberButton() {
    return Container(
      width: 60,
      height: 60,
      decoration: BoxDecoration(
        border: Border.all(color: Colors.white, width: 2.0),
        borderRadius: BorderRadius.circular(10),
        color: Constants.orangeColor,
      ),
      child: Center(
        child: Text(
          '$_number',
          style: TextStyle(
            fontSize: 30.0,
            fontWeight: FontWeight.bold,
          ),
        ),
      ),
    );
  }

  Widget _backNumberButton() {
    return Stack(
      children: <Widget>[
        Container(
          width: 60,
          height: 60,
          decoration: BoxDecoration(
            border: Border.all(color: Colors.white, width: 2.0),
            borderRadius: BorderRadius.circular(10),
            color: Constants.orangeColor,
          ),
          child: Center(
            child: Text(
              '$_number',
              style: TextStyle(
                fontSize: 30.0,
                fontWeight: FontWeight.bold,
              ),
            ),
          ),
        ),
        Opacity(
            opacity: .8,
            child: Container(
                width: 60,
                height: 60,
                decoration: BoxDecoration(
                  borderRadius: BorderRadius.circular(10),
                  color: Colors.black,
                )))
      ],
    );
  }
}
注目するところはこちらになります。
FlipCard(
      direction: FlipDirection.HORIZONTAL,
      speed: 500,
      // タップイベント
      onFlip: _onPressed,
      flipOnTouch: _isOnTouch,
      front: _frontNumberButton(),
      back: _backNumberButton(),
    );
FlipCard はフリップ速度をコントロールできるので500 に指定します。
フリップの報告は縦は違和感しかないので横(HORIZONTAL) に指定します。
そして、前面(front) と背面(back) にそれぞれ乗せたいウィジェットを乗せるといった感じになります。
_frontNumberButton() のウィジェットはこちらになります。
Widget _frontNumberButton() {
    return Container(
      width: 60,
      height: 60,
      decoration: BoxDecoration(
        border: Border.all(color: Colors.white, width: 2.0),
        borderRadius: BorderRadius.circular(10),
        color: Constants.orangeColor,
      ),
      child: Center(
        child: Text(
          '$_number',
          style: TextStyle(
            fontSize: 30.0,
            fontWeight: FontWeight.bold,
          ),
        ),
      ),
    );
  }
_backNumberButton() のデザインはタップ後にボタンを押せなくして、
さらに少し非アクティブに見せたいので黒色のカバーを乗せます。
Widget _backNumberButton() {
return Stack(
children: <Widget>[
Container(
width: 60,
height: 60,
decoration: BoxDecoration(
border: Border.all(color: Colors.white, width: 2.0),
borderRadius: BorderRadius.circular(10),
color: Constants.orangeColor,
),
child: Center(
child: Text(
'$_number',
style: TextStyle(
fontSize: 30.0,
fontWeight: FontWeight.bold,
),
),
),
),
Opacity(
opacity: .8,
child: Container(
width: 60,
height: 60,
decoration: BoxDecoration(
borderRadius: BorderRadius.circular(10),
color: Colors.black,
)))
],
);
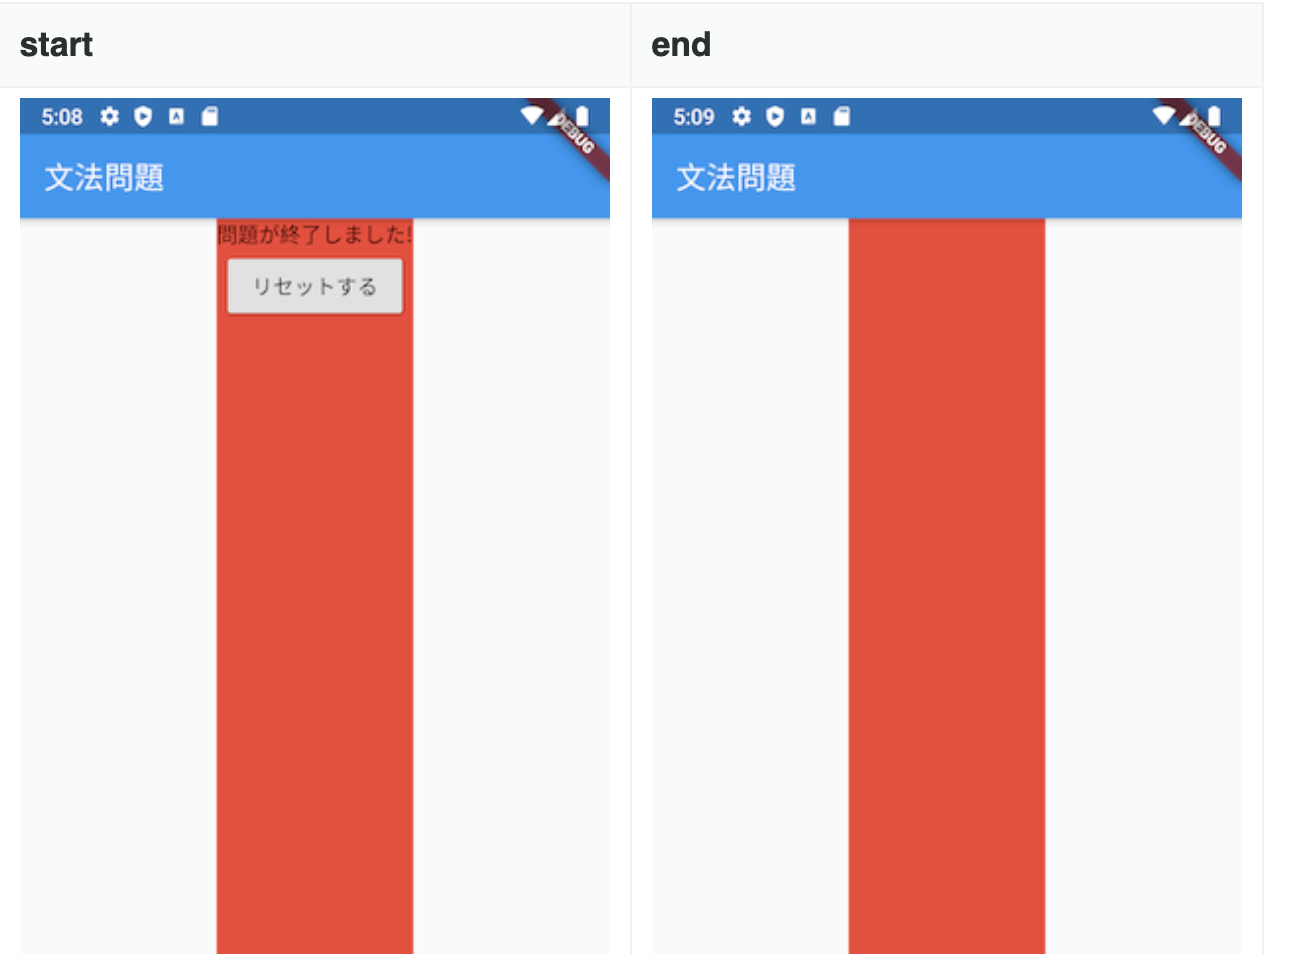
}こちらをビルドして確認すると下のようなアニメーションが出来ているのが分かります。
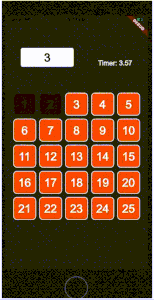
だんだんゲームぽく見えてきましたね。
これでゲーム画面での最後の機能は右上のタイマーのみになります。
ただ Dartの Time 系の API 操作が結構難しそうでこれを作れるかちょっと不安です。