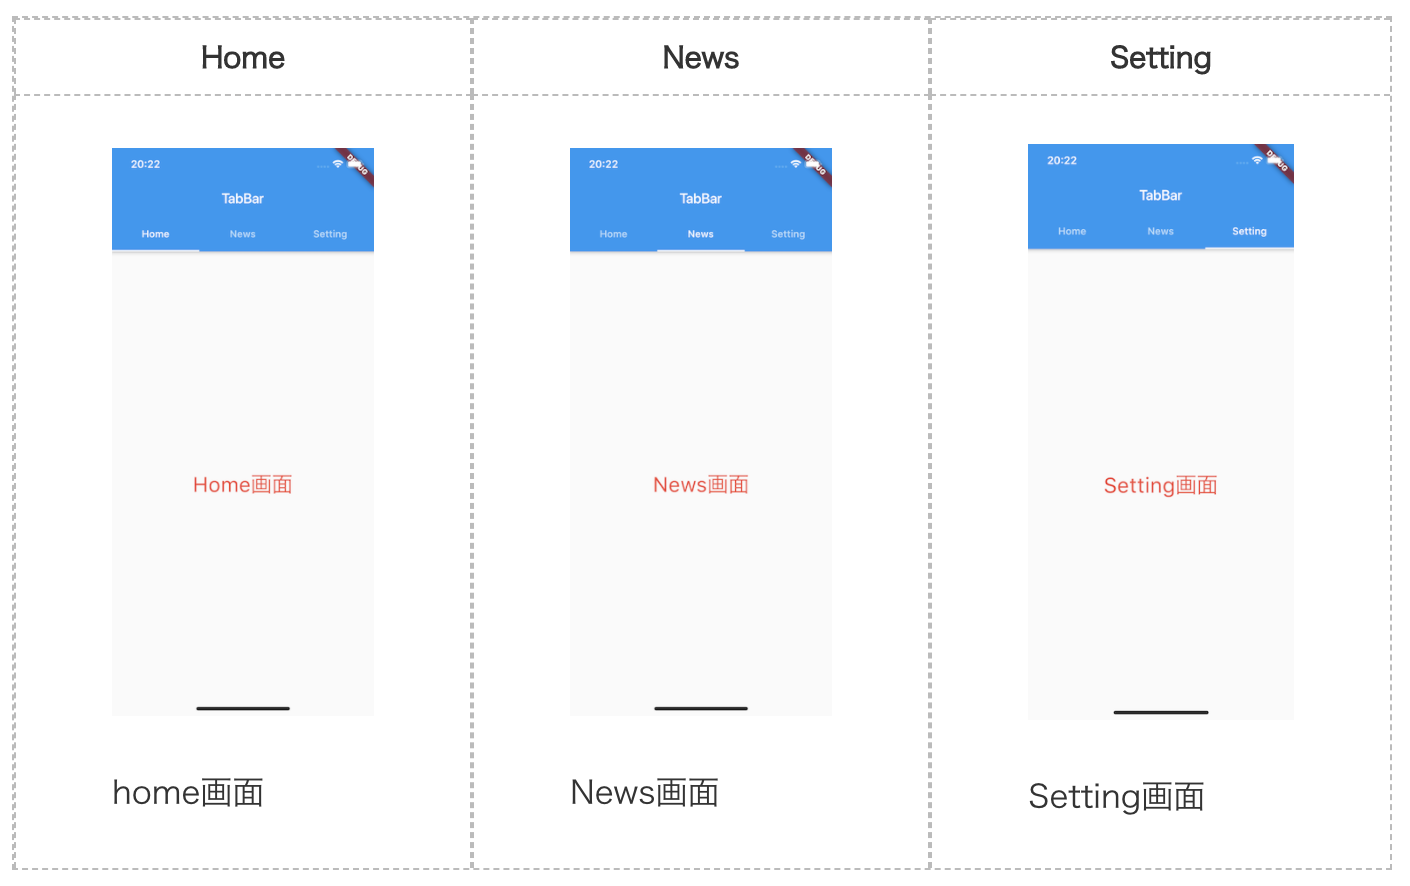
17. FlutterでSegmentController的なUIをTabBarViewを使って実装する
tamappe Tamappe Life Log

今日はStack について学習します。
Stack は縦でも横でもなくウィジェットを重ねるためのレイアウトです。
基本的なイメージは前回のColumnやRowと同じ機能で複数のウィジェットを配置するために用いられます。
つまり、ColumnやRowと全く同じものになります。
ウィジェットの配置が違うだけで、仕組みは同じというのがわかります。
と思ったのですが、ColumnやRow みたいなプロパティが存在していませんでした。
つまり、
のプロパティが見られませんでした。
使えるプロパティは
Stack({
    Key key,
    this.alignment = AlignmentDirectional.topStart,
    this.textDirection,
    this.fit = StackFit.loose,
    this.overflow = Overflow.clip,
    List<Widget> children = const <Widget>[],
  })
のようになっています。
サンプルコードでStackの使い方の雰囲気を掴みます。
stackview.dart
import 'package:flutter/material.dart';

class StackView extends StatefulWidget {
  @override
  _StackViewState createState() => _StackViewState();
}

class _StackViewState extends State<StackView> {
  @override
  Widget build(BuildContext context) {
    return Scaffold(
      appBar: AppBar(
        title: Text('Stack Sample'),
      ),
      body: Stack(
        children: _stackViews,
      ),
    );
  }

  var _stackViews = <Widget>[
    Stack(
      children: <Widget>[
        Container(
          color: Colors.red,
          width: 300.0,
          height: 300.0,
          child: Text(
            "1st View",
            style: TextStyle(
                fontSize: 30.0,
                fontWeight: FontWeight.w400,
                fontFamily: "Roboto"),
          ),
        ),
        Container(
          color: Colors.green,
          width: 200.0,
          height: 200.0,
          child: Text(
            "2nd View",
            style: TextStyle(
                fontSize: 30.0,
                fontWeight: FontWeight.w400,
                fontFamily: "Roboto"),
          ),
        ),
        Container(
          color: Colors.blue,
          width: 100.0,
          height: 100.0,
          child: Text(
            "3rd View",
            style: TextStyle(
                fontSize: 30.0,
                fontWeight: FontWeight.w400,
                fontFamily: "Roboto"),
          ),
        ),
      ],
    )
  ];
}main.dart
import 'package:flutter/material.dart';
import './stackview.dart';

void main() => runApp(MyApp());

class MyApp extends StatelessWidget {
  final title = 'Stackのサンプルコード';
  @override
  Widget build(BuildContext context) {
    return new MaterialApp(
      debugShowCheckedModeBanner: true,
      title: 'Sample App',
      theme: new ThemeData(
        primarySwatch: Colors.blue,
        primaryColor: const Color(0xff2196f3),
        accentColor: const Color(0xff2196f3),
        canvasColor: const Color(0xfffafafa),
      ),
      home: new StackView(),
    );
  }
}これをビルドすると次のスクリーンショットのように表示されます。

Stackのサンプル
iOSでいえば普通のUIViewのような印象を受けますが、複数のウィジェットを重ねるときにStackを使うと覚えればうまくレイアウトの配置ができると思いました。
次はGridViewを予定していますが、GridViewのGridView.countとGridView.extendの違いがまだ理解していませんので
丁寧に学習を進めたいと思っています。